Architecture and design.
Getting Started
Thanks for purchasing the Writing X template. In this brief guide we cover all the basics on how to edit basic elements (i.e. colors, fonts, CMS content, etc) from the Writing X Webflow template.
If you are not very familiar with Webflow, we highly recommend you to take the Webflow 101 Crash Course from Webflow University, as it will teach you all the basics to get up and running.
- Webflow University: Visit university.webflow.com to access tutorials, guides, and videos to enhance your Webflow skills.
- Webflow Community: Join the Webflow Community at forum.webflow.com to connect with other Webflow users, ask questions, and share your experiences.
- Support: If you need assistance with your Webflow account or have technical questions, visit the Webflow Help Center or contact Webflow Support.
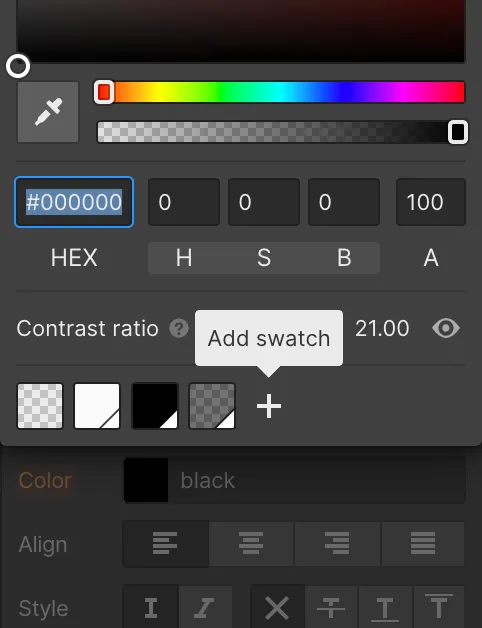
Colors :
We have implemented a convenient feature called Color Swatches, which allows you to effortlessly modify colors throughout your entire website.
To take advantage of this feature, follow these steps:
- Open the Style tab located in the right sidebar of the Webflow Designer.
- Scroll down to the Typography section and click on "Color.
- By clicking on a color, you will gain access to the color swatches associated with the template.
- Edit any color swatch to your desired color, and the change will automatically propagate across your entire site
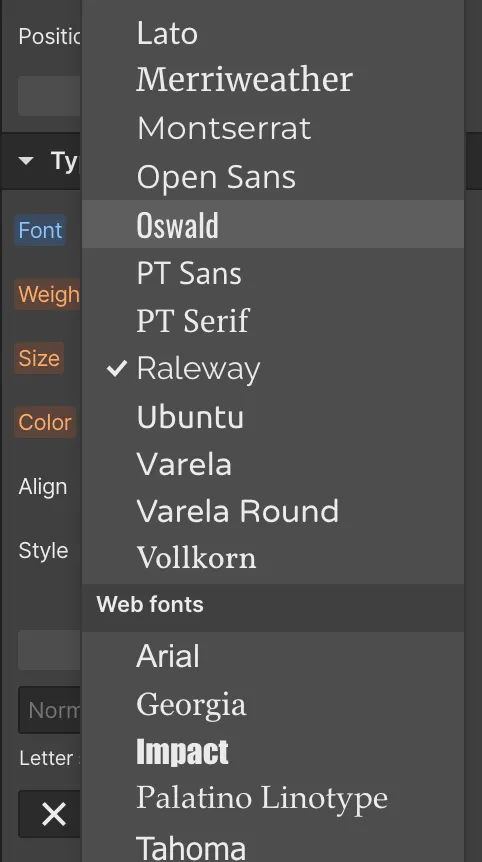
Fonts :
Minimal By Polish_ Template employs a consistent font style across the entire website, which simplifies the process of updating fonts site-wide.
The primary & secondary fonts are Raleway and DM Sans, both are free Google fonts.
The whole website content is based on Raleway, except for paragraphs and quotes.
Here's how you can make font changes with ease:
- On any page of your Webflow project, locate the Style tab on the right sidebar.
- In the top right corner of the Style tab, you will find the orange selector option. Click on it.
- From the dropdown menu, select "Body (All Pages)." This ensures that your font changes will apply universally to all pages.
- Scroll down to the Typography section below, where you can access various font-related settings.
- Within the Typography section, you have the flexibility to modify the font selection to match your brand identity. Choose any desired font that aligns with your business branding.
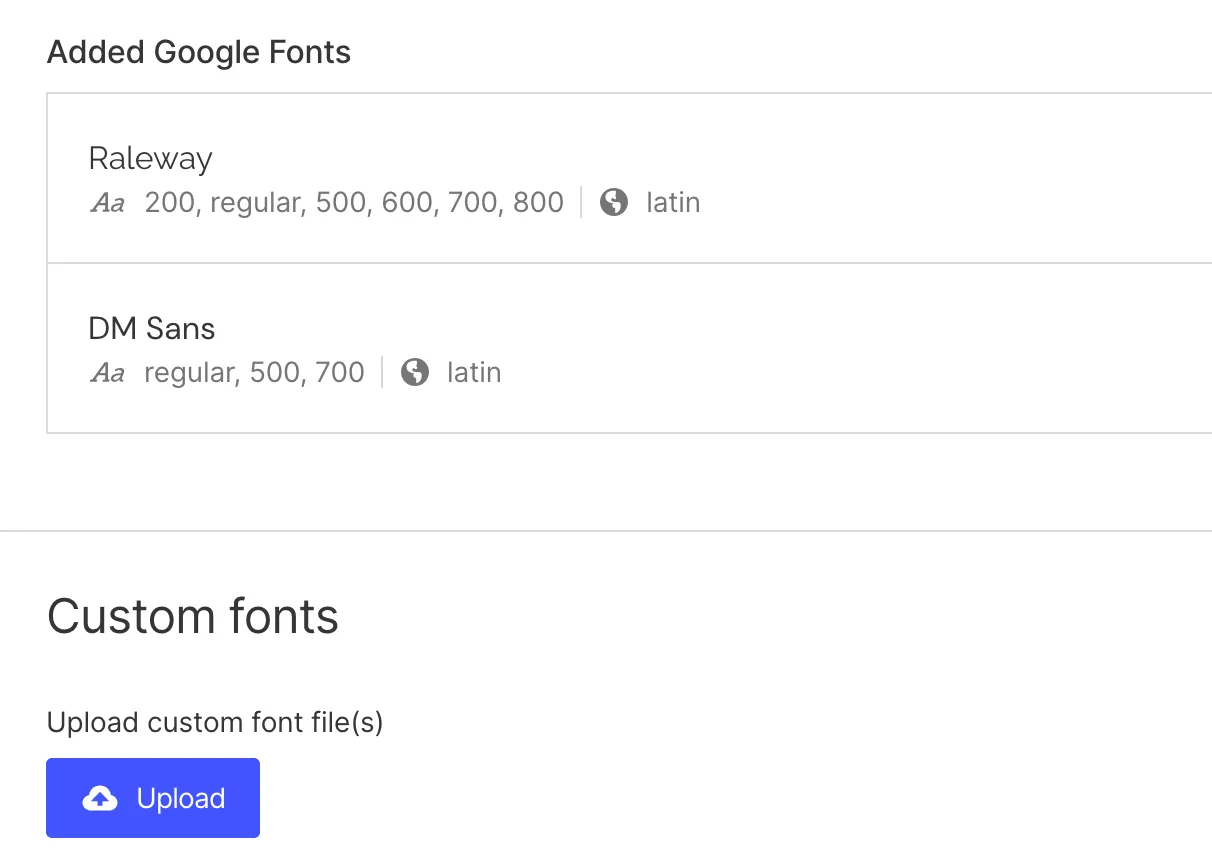
If you require a custom or premium font that is not available within Webflow's font library, you have the flexibility to upload your own custom fonts or connect your Adobe Fonts account. Here's how you can access these options:
- Navigate to your Webflow project and click on the "Project Settings" button located in the left sidebar.
- Within the Project Settings, find and click on the "Fonts" tab.
- In the Fonts tab, you will see the option to upload custom fonts. Simply click on the "Upload Fonts" button to add your own font files.
- Follow the instructions provided to upload your custom font files in the supported formats (e.g., .woff, .woff2).
- If you have an Adobe Fonts account, you can also connect it to your Webflow project. Click on the "Connect Adobe Fonts" button and follow the prompts to integrate your Adobe Fonts into Webflow.
Existing components :
Check out our component pages , it contains the same layout used in this website, you can copy/paste a component to any page.
Important : If you want to create a new page, check again the top of this page (Section Website Base), the existing architecture of this website should be taken under consideration in order for everything to function as intended.
Animations :
You can remove or adjust this website's animations in the Interactions Panel (respresented by a spark in the designer tab).
- Slide Nav Down On Click :
- Slide Nav Up On Click :
- Play Video Button Follows Cursor :
- Hypen Slides Left On Hover Link : When hovering a Link/CTA (containing a hypen) , the hypen will slightly move
- Hypen Returns To Place On Hover Out : The hyphen mentionned above goes back to place when the cursor isn't hovering anymore the Link/CTA
- Moving Link Follows Cursor : The selected link follows the cursor when hovering it's parent element
- Underline Nav Link On Hover : when hovering a navigation link (Navbar & Footer), the link slowly gets underlined
- Remove Underlign From Nav Link : when hovering out a navigation link (Navbar & Footer), the link slowly hides itself
- Make Element Appear With Slide Up : when scrolling through the page for the first time (refreshing the page restarts the animation), elements (may be text, images, etc...) become visible and slightly elevates,
- Make Element Appear Slower : it's the same animation as Make Element Appear With Slide Up, but a little bit slower, perfect for hero sections (First section in a page)
- Grow Line when Reaches Viewport : when scrolling through the page for the first time (refreshing the page restarts the animation), lines grow horizontally, adding a beautiful effect and making the website filled with life !
- Arrow Fly When Hovering a Link with an Arrow :When hovering a Link/CTA (containing an arrow) , the arrow will slightly move (in the Z axis)
- Arrow Goes Back To Place When Hovering Out Link with Arrow : When hovering out a Link/CTA containing an arrow, the arrow slowly goes back to place.
- Make Element Appear Without It Moving : when scrolling through the page for the first time (refreshing the page restarts the animation), elements (may be text, images, etc...) become visible (without moving)
- Slide Navbar To Top On Slide Up : when scrolling down , the navbar hides itself to show more content of the website
- Slide Navbar To Initial Position On Slide Down : Navbar shows itself when scrolling up
- Play Menu Button Animation + slide nav links from top to bottom : When opening the navbar, navlinks are animated (sliding to bottom and appearing)
- reset menu button and slide the nav links up and hide them : when closing the navbar, navlinks animate (sliding to top and dissapearing)
Collections :
Webflow CMS collections are a powerful feature that allows users to organize and manage dynamic content on their websites. With CMS collections, you can create structured data models, defining different content types such as blog posts, projects or team members. Each collection item can have its own set of fields, such as text, images, or even complex data like embedded videos or related links. You can easily add, edit, or remove items within the collection, making it a flexible solution for content management. Additionally, Webflow's intuitive interface allows you to design custom templates for displaying the collection items, giving you full control over the presentation of your content. Whether you're building a simple blog or a complex e-commerce site, CMS collections provide a streamlined way to organize and update your website's content efficiently.
- Each CMS item has a specific page for it (Awards & Team Members excluded), per example, for projects, check out the projects template page and choose any project in the top bar to see how the content fits in the website.
- The awards Collection is meant to be used only in awards section, without having a whole template page for it, since website visitors can view/download the award certificate )
- Minimal by Polish_ Template uses categories for Projects and Blog collections, the main purpose of these categories is to filter projects or blog posts. make sure your each project/blog post is connected to a category.
- To limit the scrolling time and page loading duration , we decided to add pagination for the CMS collections :
For Projects : (in page : projects), if the number of projects is superior to 8 projects, a previous/next button will be automatically added.
For Blog Posts: (in page : blog), if the number of blog posts is superior to 6 projects, a previous/next button will be automatically added. - When a CMS Collection is empty, the empty state is activated, we created two empty states for a collection:
- Empty State : simple layout with the font used in the website.
- Empty State Hidden : hides the empty state.